Run Your First Scenario
-
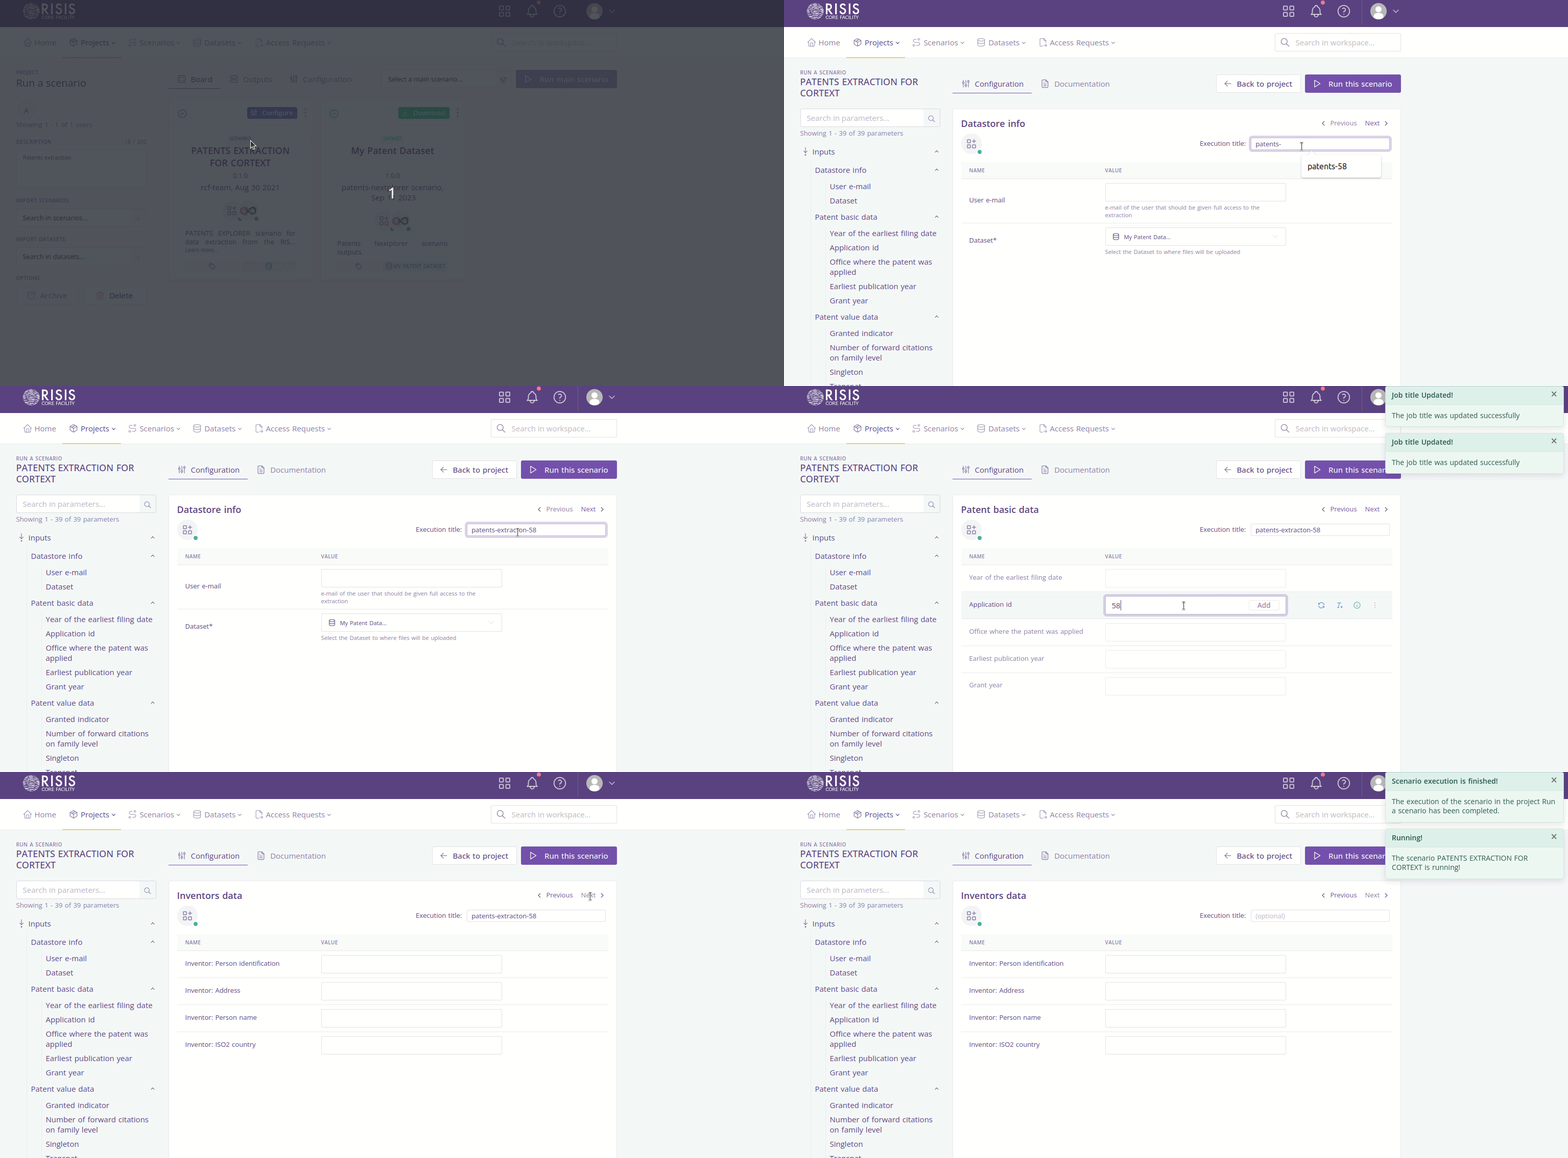
Login into https://rcf.risis.io.
-
Create a project. For this example, we created a project named “Patents extraction”.
-
Import the scenario ‘Patents Extraction for Cortext’.

-
Create and import a dataset where the results of the execution will be stored. For this case, we created a dataset named “Dataset for Patents Extraction”.

-
Click in ‘Configure’

-
You will see three principal sections on the page.
- Search section: If you want, you can write a word and the system will apply a filter selecting inputs fields that contains in the title the word inputted.

- List of the inputs: This is a list with all inputs that you can configure to run a scenario. Some of them are required.
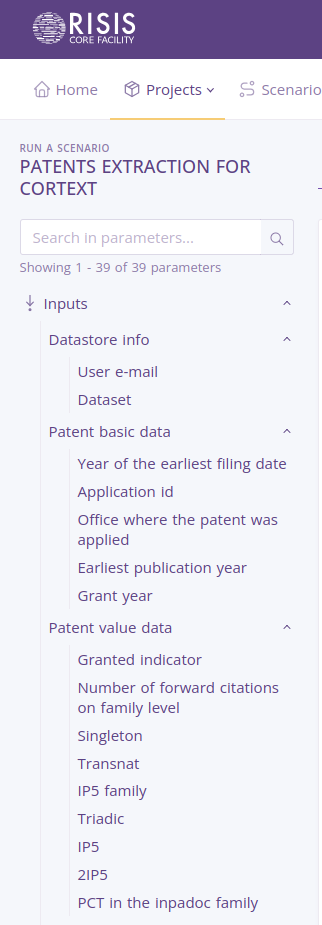
- Configurable section: In this part, each input value has an input field to write a new value, you can change as you want with correct values. Remember to fill ALL values required to run the scenario.
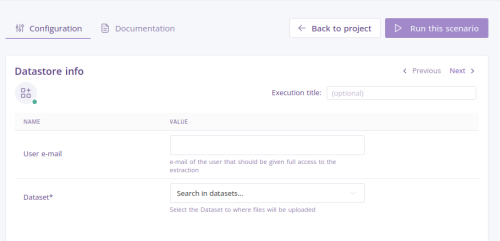
- Search section: If you want, you can write a word and the system will apply a filter selecting inputs fields that contains in the title the word inputted.
-
Each input has some actions to do if you want, located at the right of each input.
- Reset Option: If the input has a default value, the system will change the value to the default value.

- Clear Option: The system will clear the input field

- Change Option: In some cases, there are some values by default, and you can change the value by clicking on this option.

- Info Option: If you need some information, please click on this option

- Reset Option: If the input has a default value, the system will change the value to the default value.
-
For this scenario, we need to fill two fields.
- Application id: We will put a number 58, and after pressing the key ‘Enter’ on your keyboard or click on the add button.
 The idea is that the number stays like this:

- Dataset: We need to select one of the datasets. For our case, we will select the dataset imported previously (‘Dataset for Patents Extraction’).
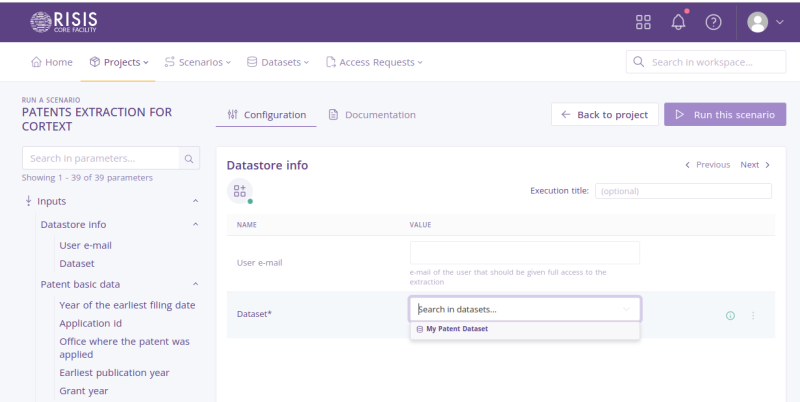
- Application id: We will put a number 58, and after pressing the key ‘Enter’ on your keyboard or click on the add button.
-
When all the required fields will stay filled. The ‘Run this scenario’ button will be available to run.
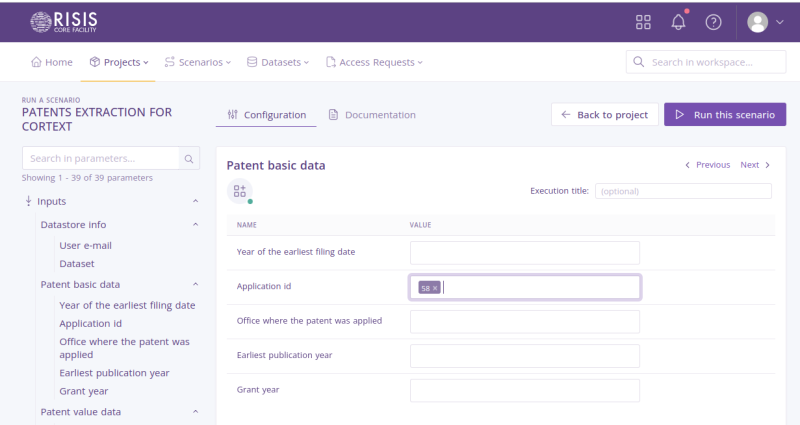
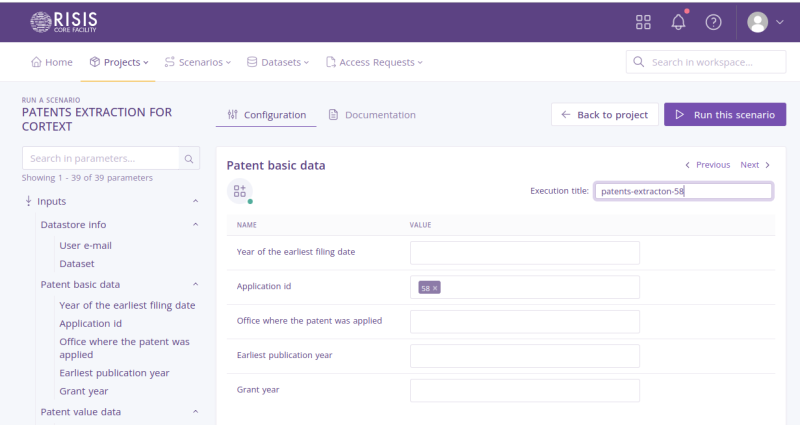
In order to facilitate the categorization of each scenario configuration execution, users require a method for labeling them. This designated label can subsequently be displayed within the executions list. This can be accomplished by incorporating a straightforward text field within the configuration view, where a placeholder, such as the execution number or date-time, can be pre-set for user convenience.
After clicking on 'Run this scenario", you will see a green notification saying that the scenario is running.

- After some time (Depending on the scenario and the tasks), you will receive a notification with the result of the operation (A green notification means that the scenario runs successfully, but if you receive a red notification, it means that there was an error during the execution). You can see the notification in the bell located next to your profile image in the top menu.
- Notification of execution failed

- Notification of an execution successfully

- Notification of execution failed
- The execution of a scenario was done successfully.